Materials:
You need the right brushes. Period. I can't stress makeup brushes enough!
Sonia Kashuk 5 pc. brushes
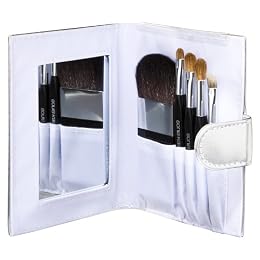
I do not recommend this, even if it's for $10 at Target. The mirror is too small, the brush handles are too tiny, hard to maneuver the brushes, and the bristles are rough and hurt! You're just paying for a compact case, really.
The two sets of brushes I own are:
CVS Essence of Beauty Travel Kit for Eyes

A little tiny but I got them because the function of the brushes were labeled on the actual brush and it has dual ends. It sold for $10 at CVS and is definitely worth it. The pouch is also very tiny and portable.
CVS Essence of Beauty Deluxe Duo Set for Face

Again, brushes are labeled which was a plus. It was $15 at CVS. Not only were both sets on sale, but the one-ended individual brushes were from $8 to $10 a piece! So this was definitely a steal. The brushes are so soft!
I don't know if CVS's sale on these two packs are going to last. When I went to the one on Valley Mills (the 24 hour one), I grabbed the last few remaining.
Different Skin Types:
Normal - good complexion, healthy amount of oil; least problematic
Dry
Oily
Combination - oily on the T-zone (forehead + nose) but dry on cheeks
Sensitive - usually very dry, becomes inflamed and irritated easily; most problematic
My skin is flaky and super dry during mid-winter time and very shiny/oily during mid-summer time. On occasion, I'll have signs of both at the same time. Since I have combination skin, I always look for normal/combination formulas.
Onto prepping for makeup...
Before putting on makeup, you need to prep your skin first. Tone (optional), moisturize, apply foundation, conceal, and use primer(optional) in that order. By doing these, it acts as an adhesive base for the rest of your makeup and allows it to last longer.
Toning - Cleans excess sebum and dirt so makeup is not hindered by unnecessary contaminants
Moisturizing - Hydrates the skin and some can give UV ray protection
Foundation - Adhesive base for your makeup
Conceal - conceal trouble areas
Primer - Additional adhesive base for your makeup, particularly eyeshadow.
I like to tone because I actually see that it lifts a considerable amount of dirt off my face but there's a lot of debate as to whether or not it's needed.
Toner:
An inexpensive way is to make your own with organic rice water (Organic is free of pesticides that may irritate sensitive skin).

Different rice have different ingredients so use whichever you choose. Just make sure the water turns murky to extract the nutrients. Now grab a cotton pad and wipe away!
Moisturizer:
Pond's Dry Skin Cream
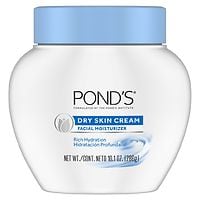
It's a quick, inexpensive fix (~$6 to $8). The cons are that it has no SPF, contains mineral oil, and contains paraben.
The catch to why this moisturizer is cheap is because mineral oil is a main ingredient. Mineral oil is cheap to refine and it may potentially cause or worsen acne for people with acne-prone skin. Paraben (under the family of benzenes) is another ingredient that is also cheap to refine. Thankfully for most people with normal skin, neither chemical is irritating to the skin but a few percentage of people do experience rosacea (reddening) and contact dermatitis (irritability on contact) because of paraben.
The only problem I have with this is that it has no SPF. I have to rely on my foundation to get SPF 15, which sucks when there's days where I don't want makeup but still want the SPF.
IQQU Advance Sunscreen

It claims that it is makeup friendly, SPF 35 UVA/UVB protection, and best of all non-Comedogenic (meaning causing no acne problems). I'm looking into getting this in the future, though $33 for 40 ml sounds very pricey. I'm a little hesitant so we'll see...
Finding the right foundation...
Undertones:
Besides the intensity of the color, foundations also have an undertone hue.
The 3 undertones are cool, neutral, and warm.
Cool - skin has a pink or rosy cast; sunburns easily
Neutral - even-toned, neutral cast, not too pink and not too golden
Warm - golden or olive cast; suntans easily
I'm a cool because my cheeks tend to be rosy (especially in hot weather) and I sunburn easily.
Finding the right undertone can be a little frustrating but don't skimp. It makes a huge difference. Cool undertone depends on a yellow hue while warm depends on a brownish hue. If you're not sure, open the bottles in store and blend some on the underside of your wrist. If it disappears, that's the right shade for you.
Basics of foundation:
Now pick a foundation based on your skin type.
Oily skin - opt for a powder foundation
Dry skin - try liquid foundation
Normal/combination - get a normal/combination formula
If you use the wrong form, you will either look like a walking greaseball or have embarassing patches of flakes on your face!
SPF in foundation:
15 is minimum. 35 is optimal. It should also block both UVA and UVB. SPF contains light-reflecting particles so this means that in pictures, it will reflect more light in flash photography making you look more ghastly white. If you know there's pictures involved, use a non-SPF foundation. For this reason, I always carry one SPF and one non-SPF foundation.
Terminology:
Light coverage - how heavy it feels on your face and the amount it will cover
Medium coverage - how heavy it feels on your face and the amount it will cover
Heavy coverage - how heavy it feels on your face and the amount it will cover
Matte finish - just the color; no shimmer or glitter
Dewy finish - refers to mimicing the look of wet, fresh dew drops on the face; shiny but subtle
Satin finish - sheer and glowy
I'm afraid of light coverage being too light and heavy looking too obvious so I use medium coverage. I'm not a big fan of glitter so I use a matte finish.
Applying foundation:
Always blend in downward motions.

As a general rule of thumb, blend downward whenever and/or towards your hairline.Don't forget your neck!
These 5 areas tend to have redness. Don't neglect them.

Dark Circles

Be sure to apply foundation on your dark circles as well.
I like to tilt my head down to easily spot the circles. Then I apply foundation with a brush. Or you can use the ring finger and dab it in a rolling motion from inner to outer corner.
Don't tug at your skin, especially at the dark circles; this will cause premature sagging and wrinkles.
General Foundation Tips
- Do NOT use concealer before foundation! Concealer corrects what foundation doesn't but foundation will not correct concealer.
- Pouring liquid foundation (among other things) on the back of the hand is a lot better than pouring it on the brush.
Recommendations:
Almay Line Smoothing Foundation (Liquid)

This foundation is a good starting point for anyone new. It gives light coverage, smooths out lines, and gives a dewy finish. Good for dry skin.
Almay Pure Blends 97.4% Natural (Liquid)

Super light coverage! All natural ingredients come from plants. Good for sensitive skin.
L'oreal True Match

If you ever decide to buy from L'oreal, buy this line. L'oreal True Match has a huge selection! I was so surprised. It comes in both powder and liquid form. It's a medium coverage but to me, it feels pretty light (especially in powder form). The good thing is that they have a huge selection for each shade and all the undertones.
Revlon ColorStay

This is my current favorite foundation in medium coverage. I'm really really surprised how long it lasts and it lasts longer than the powder form of L'oreal's True Match. But it's pretty difficult to blend without a brush. It looks pretty concentrated so I use a dime-sized amount for the entire face. It felt gross at first but if you use a small enough amount, it feels closer to light but still covers closer to medium. They cater to a lot of skin types which was a huge plus.
Neutrogena Healthy Skin Antioxident Liquid

Coverage is light to medium with SPF properties. Good for normal to oily skin. Bad for sensitive skin. Stay away!
Sally Hansen Airbrush Spray Makeup

Light to medium coverage with satin finish. Paraben free and hypoallergenic! It has some fragrance which could be a deterrent for some. Otherwise, it feels light.
Brand Insight
- Almay makes good foundations for sensitive and dry skin.
R- evlon and L'oreal are good for all skin types because they tend to cater to every skin type.
- L'Oreal's powder form of True Match feels like it doesn't stay on nearly as long as ColorStay but I still like it.
- My favorite is definitely Revlon ColorStay at the moment. The only issue I had was that the SPF reflects light a lot more than I thought. It made me horribly ghastly white in pictures even though I matched the hue just fine.
Concealer
I'm not really an avid user of concealer since I only use it to conceal dark circles. Again, tilt your head down to locate dark circles. Dab with your finger in a rolling motion or sweep with a brush. The point of concealing dark circles is to make them less obvious and NOT to completely hide them. Unless it's really important, I don't use concealer on pimples so as to not make them worse.
Primer:

I haven't used primer but Urban Decay's Eyeshadow Primer Potion is said to have been one of the best. It costs $17 at Sephora.
Applying mascara:

No brainer, but I like to use a business card to shield my eyes from the mascara messing up my eyeshadow and for equal coverage. Just take one, gently pull back the eyelids, and maneuver!
Mascara Recommendations:
Maybelline Great Lash

I HATE this mascara. There was nothing great about it for me. It was a very high-maintenance mascara. You have to keep retouching it every half hour to hour. It's terrible at volume and length. It clumps together. It sucks at separating lashes. The brush is horrible quality. Not to mention, the packaging and colors are an eye sore. It is the most overrated mascara out there and not worth the $7 or $8. Seriously, go for better. This mascara needs serious reformulation.
L'Oreal Double Extend

This was the second one I ever used and this one also sucks. It was only a little bit better than the Great Lash. It does not give enough volume and lengthens only a fair amount. You have to really slather a lot of this on to even get a noticeable amount of volume. Without the volume, it makes your eyelashes just look like isolated hardened sticks coming out of your eyelids. Don't give into the dual volume/lengthen promise. More like Double Disappointment.
Bourjois Maxi Frange
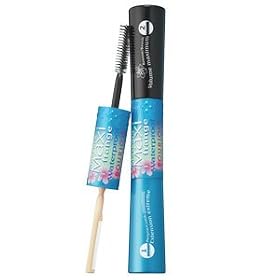
I shelled out $20 for this at Sephora and I can honestly say it's decent but not worth the money. The white end is supposed to add volume and the black end lengthens your lashes. The white end did not give the amount of volume I envisioned and the lengthened lashes makes it look awkward. In the end, all I got were half-assed lengthened lashes that weren't even voluminous. It lengthens a decent amount but don't pay extra for the volume they claim to give. It won't.
Rimmel Glam Eyes

I absolutely love this mascara. It gives just the right balance of volume without skimping on length and vice versa. The problem with other mascaras I had was it would give too much of one and not enough of the other, but this one I felt knows where the happy medium is. I was really shocked at how much it can really lengthen your lashes while still giving a noticeable amount of volume. It lengthens more than adding volume but it does lengthen by a lot. The only thing I don't like is that it sucks touching up (really dry). But I'll definitely keep using this. It cost $8 at Wal-Mart.
Oh, and stay away from Rimmel's eyeshadows. I'm not impressed. They are hardly pigmented!
Maybelline XXL Mascara

I haven't tried this but I did almost get it in place of Rimmel's Glam Eyes. The interesting thing about this one is that one end is a primer and the other lengthens. I read that it won't give too much volume however.
Eyebrows
No matter how pretty any face is, eyebrows shape the face.
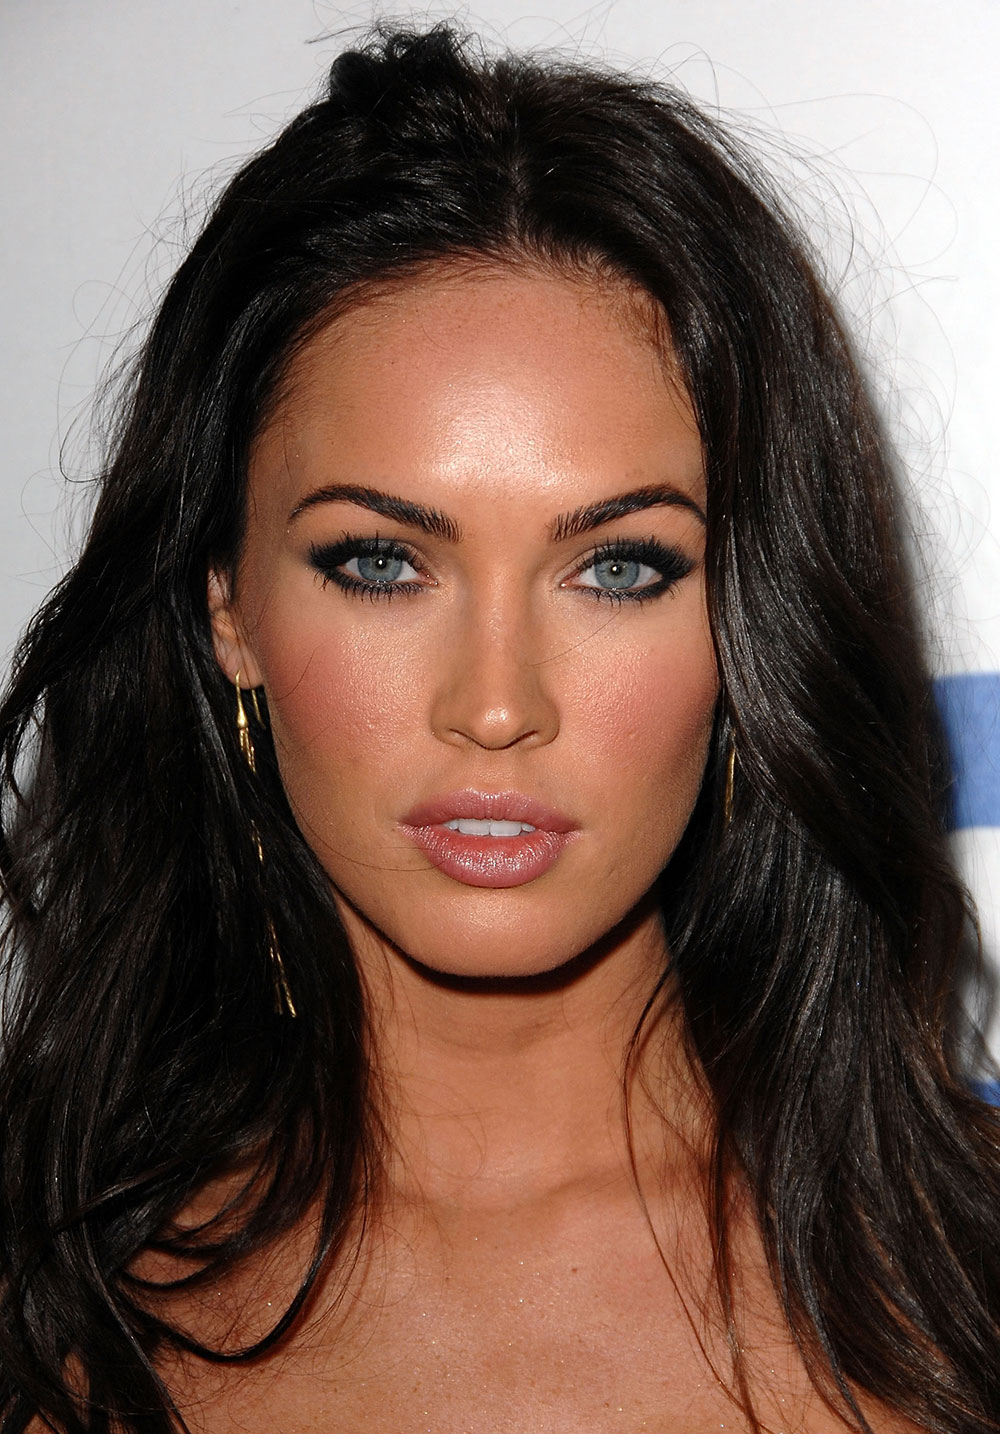
Her eyebrows draw in attention to the eyes but when you take them away...

the absence of them are all you can focus on instead of the eyes.
Anatomy
There are a lot of eyebrow shapes out there.
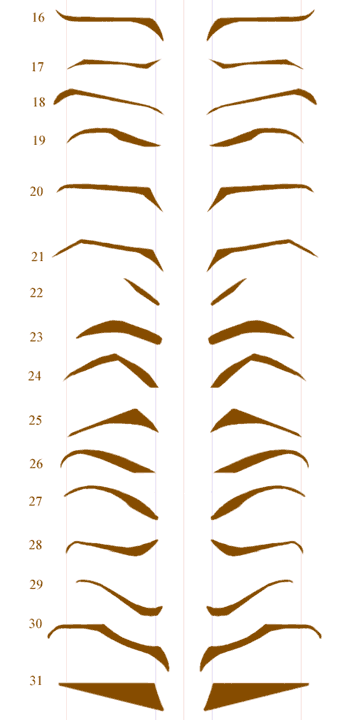
In any case, your eyebrow has 3 main points.

Notice how the eyebrow begins and ends with the inner and outer corner of the eyes.
Redefining
The shade that you use differs on hair color.
For light hair colors, go two shades darker. (i.e. light brown for blondes)
For darker hair colors, go two shades lighter. (i.e. dark brown or brown for black hair)
Some eyebrow pencils can cost a surprising amount ($20!) but you don't necessarily need an eyebrow pencil to have good eyebrows. I actually use dark brown eyeshadow with an angled brush.
Using an angled brush, dab the eyeshadow in and lightly tap any excess. Start in the middle of the eyebrow and redefine outwards. Use the leftover powder to redefine the inside. Using a comb or brush, gently brush the eyebrows from inside to outside. The eyebrows should be darker on the outside than the inside since there is naturally more hair inside than out.
Rounder eyebrows are used to draw attention away from the eyebrow area. Arched eyebrows bring attention in to the eyebrows and eye area.
Arched eyebrows are especially great for accentuating cat-eye looks and smokey eyes.
Recommendations
Anastasia Perfect Brow Pencil

I haven't tried this but it seems to have gotten good reviews. The duo brush is also pretty nifty.
Blush:
Identify cheekbones
You can either...
1. Shift your lips to one side and suck in your cheeks.


2. Or just smile (closed or open mouth) and apply.
Applying blush

Using a blush brush, apply at these areas shown.

Applying a subtle amount of blush at the jawline is completely optional. Its only purpose is to sharpen and define the jawline even more.
I notice a lot of girls dab blush on their actual cheekbone. But I purposely like to apply it a little under the actual cheekbone. By doing so, this creates the illusion that your cheek bones are higher than they really are.
NARS Blush (Color: Orgasm)

I don't own this but I've tried it twice in Sephora and loved it. I was super impressed how long it lasted (~4 hours) without having used foundation! It has shimmer but it's subtle enough. I am definitely planning on owning it in the future. It retails at Sephora for $25.
NARS Blush (Color: Super Orgasm)

I felt like this was way too shimmery and way too pigmented. It is hardly subtle at all. I quickly removed it.
Lip Gloss:
Be sure to use Chapstick underneath your lip gloss. This acts as an adhesive base for your lip gloss.
Stila Lip Gloss

This was my first lip gloss ever and I absolutely loved it. It had a good amount of staying power and I was genuinely impressed. It's also pretty neat that if you twist the end, the pen secretes more lip gloss onto the brush. I love the fact that it comes in a brush form to get every crack and crevice as opposed to a tube. Sadly, I had this confiscated at the airport because of the liquid rule and I've been sad ever since about losing it. I highly recommend this, especially because Stila is a staple in the makeup industry. (Along with Bobbi Brown, NARS, MAC, and Smashbox)
Lancome Juicy Lip Gloss

This was my first lip gloss set ever and I love it. The staying power is incredibly amazing. Two of the tubes have shimmer while one doesn't. The shimmer also isn't overpowering.
Beauty Rush by Victoria's Secret

This is my current lip gloss and I also love it. It has an impressive amount of staying power and the glitter is also cute. It's a little bit much though if you use a more red pigment coupled with glitter. It even tastes and smells good. I highly recommend this.
-----
I've tried most of the products so they're my own personal opinion. I wrote this purely to help with a comprehensive general make-up how-to, background information, and some products I liked/disliked. Everyone's entitled to their own opinions and methods. These are just my own that I've learned.